Printing wisely saves you money and time
Printing the correct data, in the right format in Excel can be sometime quite a pain. So lets look at a few tips and tricks on how to get printed what you want.
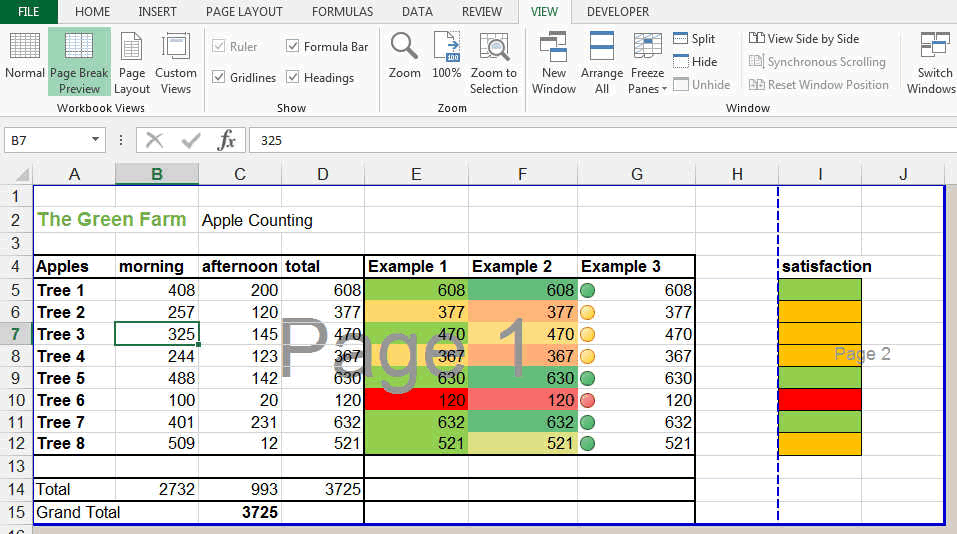
The good thing about Excel is that you have this great view called Page Break View in the VIEW Ribbon. This is really what you should be using in order to get your first prints out correctly.
When you press onto PAGE BREAK PREVIEW, the screen will change and some blue dashed / dotted line will appear as well as the markings called PAGE 1, PAGE 2, ... in the middle of eached dotted line area.
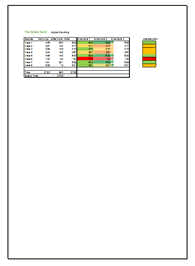
Look at our Apple Farm example
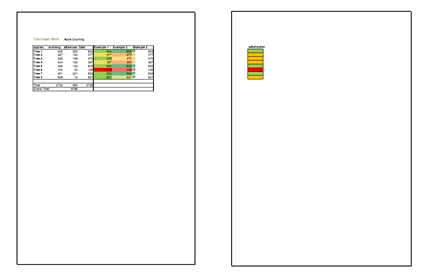
If you would now press the Print Button
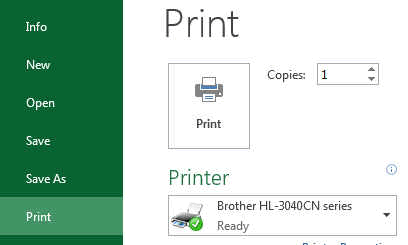
Your page would not fit on one sheet of paper but on two page like seen higher.
And this is not what you want. You would like to get everything on the sheet in portrait mode....
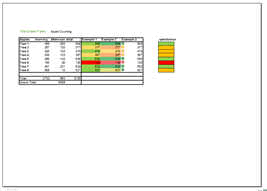
Or in landscape mode
So How to get this?
There are two ways:
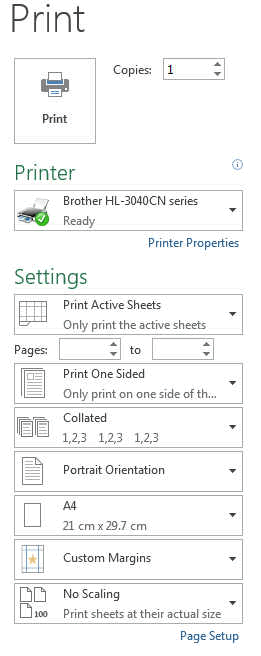
First very important, you must understand that the settings in the print menu take precedence on the margins you are setting. If you set the setting onto FIT SHEET ON ONE PAGE, then all the page breaks you will have introduced in your sheet will not be considered. That is good to know.
If You select FIT ALL ROWS ON ONE PAGE or ALL COLUMNS ON ONE PAGE, then similarly, the setting will not be considered. Only When you Select NO SCALING, will your manually inserted break be considered.
I speak about these settings:

They are located at the bottom of the print menu.
So for example if you want to print only the first 3 columns of our apple farm annual result. Then go with the mouse on the blue line and move it to the third columns.
It will look like this.

A dashed line (dotted line) means an automatic break calculated by Excel
A continuous line, is a break that you inserted or modified.
Now if you wanted to print everything you have on the page, you can insert new break page by selecting a cell and pressing the insert break page button.
This will cute the sheet horizontally and vertically, with borders going along the top of the cell and to the left of the cell. Like here:
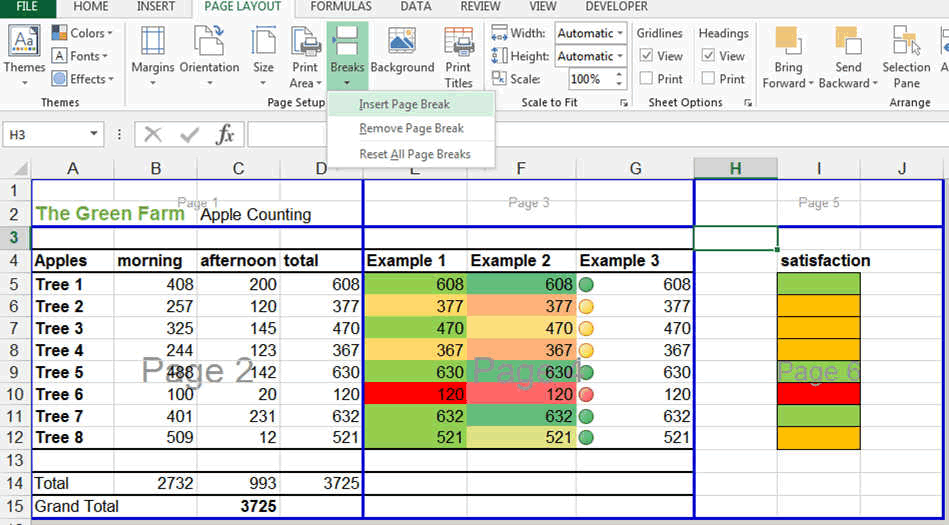
Here of course this is for the example because we do not want 6 pages but only 3. So we should actuall have done this:

This was it for the pages selection.
Now lets look at how we insert Header and Footer.
PAGE SETUP (Header and Footer, margin, etc...)
At the bottom of the Print menu, the PAGE SETUP is indicated. By pressing it, you get the following window.
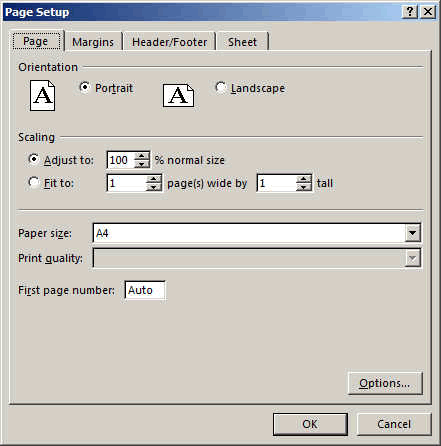
Here you can do similar sthings as in the main menu. Like Orientation Portrait or Landscape selection.
BUT, the SCALING is here totally free. You can select the percentage scaling manually or very useful, is the FIT TO function.
It allows you to Say I want everything on 2 pages wide and 2 pages high for example if you wanted to glue the 4 sheets together. Very USEFUL.
The Next TAB is MARGIN TAB.

In the margin you can setup the margin you want on top, bottom, left and right.
Very useful is the Center on Page option. Usually the HORIZONTALLY is used so that you have exactly the same space on left and right of the sheet.
Vertically would be used if you want to center a graph or a picture for example.
The Next Tab is the FOOTER and HEADER TAB.

Here you can set up what you want to be written at the very bottom of the page. Like Page number, add the file name or your company name with a copyright mention.
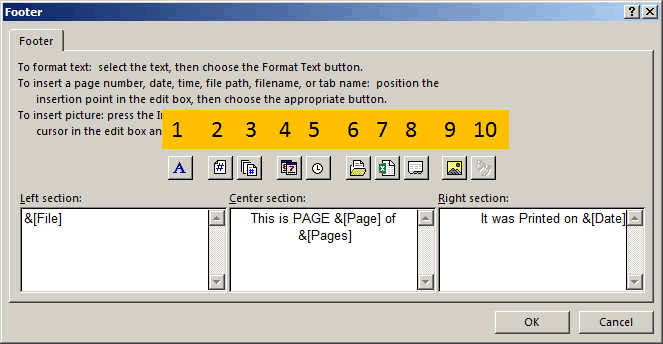
1) select the style, font you want to write the text.
2) this enters the page number that is being printed
3) this is the total number of pages
4) the date of the print
5) the time of the print
6) the directory the file is saved in
7) the file name
8) the Tab name
9) insert an image
10) the format of the image. Look at This one because usually the picture will need to be formated.

The last Tab is the SHEET Tab. It allows you to select
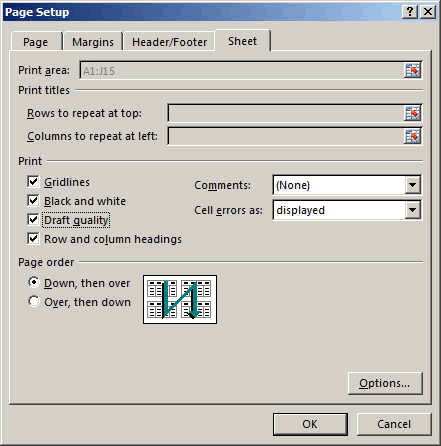
Here it allows you to print the grid line and the rows and column headings.
You can select this also in the Page Layout Ribbon, in the Sheet Options group, under Headings, select the Print check box.
One last interesting but dangerous feature is the formating in the print window. By pressing the small margin icon at the bottom right, you can activate the margins and columns width and change them all manually.

We hope that helped you.
Keep on the good job, these were only some basics. Now you will learn by doing.